
Overlay using layers
A comprehensive guide that covers how you can add images and text over a base image using the new layer syntax that supports overlay nesting and provides better positional control.
Overlay using layers
With ImageKit, you can add images and text over a base image using layers. Skip to the relevant section to understand with a quick example:
You can also learn from more advanced examples. Please check expensive transformation limits before using this in production.
Layers
A layer is a special kind of transformation in which you can specify an asset to be used as an overlay, along with its positioning and transformations. It supports nesting, allows you to modify the overlay itself, and express its position in relation to the parent.
Syntax of layers
A layer starts with l-<type> and ends with l-end. All the positional and transformation parameters of that layer are between l-<type> and l-end and only apply to that layer and not the parent base asset.
type can be image or text.
For example, in the following URL, we are adding a logo image logo.png on top of a base image, i.e. sample-image.jpg. However, we applied width (w-10) and rotation (rt-90) transformations on this overlay logo image before placing it on the base image. Transformations w-300,h-300 are applied to sample-image.jpg.
Here the parent base image has one layer inside it. A layer can also nest another layer.
Input of layer
The input of the layer can be specified using i or ie (base64 encoded) parameter. In case both i and ie are present, i is ignored. The base64 string should be made URL safe to ensure that all padding characters (=) are included correctly. In Javascript, a function like encodeURIComponent() can be used for this.
Position of layer
The position of the layer can be controlled using the following parameters. The position of the layer is always relative to the immediate parent. For instance, the parent is the base image in the above example, and the logo image is the nested layer.
| Parameter | Description |
|---|---|
lx |
|
ly |
|
lfo | Position of the layer in relative terms e.g., |
Note: If one or both of lx and ly parameters are specified along with lfo, then lfo parameter is ignored.
Transformation of layer
You can apply transformations to the layer as you would on the base asset. However, any transformation parameter inside the layer is only applicable to that layer and not the parent.
However, different types of layers support different types of transformations, which are covered in respective sections.
Transformations inside a layer can be chained together to achieve the desired outcome.
Nesting of layers
A layer can have a nested layer up to 3 levels.
For example, in the below URL, i-inner.png is rendered on the top-left corner of i-outer.png using the lfo-top_left parameter.
Add images over image
You can add an image over a base image using the following example.
Usage syntax
You can also control the position of the image overlay using these positional parameters.
To overlay images stored within a specific folder of your media library, use the complete image path where slashes (/) are replaced with @@.
For example, if the overlay image is at https://ik.imagekit.io/demo/path/to/overlay.png, then it can be used as an overlay like: https://ik.imagekit.io/demo/base-image.jpg?tr=l-image,i-path@@to@@overlay.png,l-end
Transformation of image overlay
ImageKit supports many image transformation parameters. However, inside a layer, you can apply the following transformations to the image overlay before it is placed on the base image. You can chain the transformations one after the other to achieve the desired outcome.
| Parameter | Description |
|---|---|
Width of the overlay image. It can also accept arithmetic expressions such as | |
Height of the overlay image. It can also accept arithmetic expressions such as | |
Aspect ratio of the overlay image. It can also accept arithmetic expressions such as | |
Cropping method. Accepts | |
Crop mode. Supports | |
Relative focus area used during cropping. Accepts | |
It determines how much to zoom in or out of the cropped area. It must be used along with | |
It adds a border to the overlay image. It accepts two parameters - the width of the border and the color of the border in format | |
It is used to specify the background color in RGB Hex Code (e.g. | |
It is used to control the radius of the corner. To get a circle or oval shape, set the value to | |
It is used to specify the degree by which the overlay image must be rotated. | |
By default, ImageKit.io trims the overlay image before overlaying it on the base image. Trimming removes similar colored pixels from the edges. To prevent the default trimming from happening, use | |
It is used to specify the device pixel ratio that is used to calculate the dimensions of the overlay image. It can only be used when either the height or width of the desired output image is specified. The possible values are | |
It is used to specify the quality of the output image for lossy formats like JPEG, WebP, and AVIF. A large quality number indicates a larger output image size with high quality. A small quality number indicates a smaller output image size with lower quality. It can be a whole number between | |
It is used to specify the gaussian blur that must be applied to an image. The value of | |
It is used to turn an image to a grayscale version. | |
It is used to automatically enhance the contrast of the image by using the full intensity values that particular image format allows. This means that the lighter sections of an image become even lighter and the darker sections becomes even brighter, thereby enhancing the contrast. | |
It is used to sharpen the input image, useful when highlighting the edges and finer details within an image. If just the | |
It is used to apply and control unsharp masks on your images. The amount of sharpening can be varied using 4 parameters - | |
It is used to apply a shadow effect on the input image. The strength, blur and the geometrical positioning of the shadow can be varied using the following parameters - | |
It is used to add a linear gradient overlay over an input image. The direction, from color, to color and the stop point of the gradient can be varied using the following parameters - |
Add text over image
You can add any text string over a base image using the following examples.
You can also control the position of the text overlay using these positional parameters.
Usage syntax
Plain text overlay
Specified with the i- parameter in a text layer. Supported characters include:
All alphabets and numbers (including Unicode letters, marks, and numerals in other languages)
Spaces
Special characters including _, -, %, !, @, and &
Base64 encoded text overlay
It is specified with the ie- parameter in a text layer. It accepts a base64 string as input, allowing you to overlay special Unicode characters (e.g. ©, ®, ™, etc.) that you cannot otherwise pass in a URL as a plain string.
The base64 string should be made URL safe to ensure that all padding characters(=) are included correctly. In Javascript, a function like
encodeURIComponent()can be used for this.Input above the length of 144 characters will be truncated.
Here aGVsbG8%3D is the base64 string for "hello".
Transformation of text overlay
Following transformation parameters are supported on the text inside a layer.
| Parameter | Non-layer syntax equivalent | Description |
|---|---|---|
w | The maximum width (in pixels) of the overlaid text on the image. The text is wrapped so that any words in a line that go beyond the given width are sent to the next line. The height of the text box is calculated automatically based on the total number of lines. It can also accept arithmetic expressions such as | |
fs | It is used to specify the font size. It can also accept arithmetic expressions such as | |
ff | It is used to specify the font of the overlaid text on the image. You can choose any font from this list or use a custom font. | |
co | It is used to specify the color and transparency of the overlaid text on the image. It accepts RGB Hex Codes (e.g. | |
ia | Inner alignment. Accepts | |
pa | It is used to specify the padding around the overlaid text on the image. Supports any positive integer or a set of positive integers separated by underscores. The set of integers follow CSS shorthand order for determining the padding along each side of the overlay. e.g. | |
al | It is used to specify the transparency level of the overlaid text layer. Supports integers from | |
tg | Typography. Supports bold | |
It is used to specify the background color in RGB Hex Code (e.g. | ||
It is used to control the radius of the corner. To get a circle or oval shape, set the value to |
Using custom fonts in text overlays
To use a custom font in text overlays, upload the font file in your media library and pass its path in the ff parameter in a text layer.
Here the font file is available at path /Lacquer-Regular_nGqtVsBJT.ttf in the media library. You will need to pass the whole path of the custom font, including its extension.
If your custom font file is in a nested folder, then replace the slashes /in the path with @@. For example, a font file available at path /font-folder/font-subfolder/my-custom-font.ttf will be used as follows:
Differences between overlay text output in layer and non-layer syntax
In overlay text, the output generated using the layers syntax may be slightly different from its non-layer syntax equivalent. If you are moving from non-layer overlay syntax to layer syntax, you may need to adjust some transformation parameter values to get a similar output as before.
These differences include but are not limited to:
Top and bottom padding: Apparent empty space (or padding) on the top and bottom of overlay text will be slightly lesser in layer syntax than non-layer syntax. It can be handled by increasing the top and bottom padding accordingly using the
palayer transformation parameter.Trimming: Any empty space around the text output will be trimmed by default in the layer syntax output. It can be handled by adding the required padding using the
palayer transformation parameter.Line height: The line height of the text will be marginally larger in layer syntax. It cannot be controlled manually for the moment.
Line breakpoints: The points at which sentences break when maximum width is used may be different. It cannot be controlled manually.
Unicode language support: Layer overlay text supports Unicode letters, marks, and numerals in other languages, while non-layer overlay text does not.
Add solid color blocks over image
You can add a solid color block over a base image using the following example.
Usage syntax
You can also control the position of the solid color overlay using these positional parameters.
Transformation of solid color overlay
Following transformation parameters are supported on the solid color block overlay inside a layer.
| Parameter | Description |
|---|---|
w | Width of solid color block. It can also accept arithmetic expressions such as |
h | Height of solid color block. It can also accept arithmetic expressions such as |
It is used to specify the color of the block in RGB Hex Code (e.g. | |
al | It is used to specify the transparency level of the overlaid solid color layer. Supports integers from |
It is used to control the radius of the corner. To get a circle or oval shape, set the value to |
If both bg and al are set in a single transformation and bg has an alpha component, then that value is used to set solid color background transparency. Otherwise, al value is used. If bg is set to a standard color name (e.g. blue), then the al value is ignored. Read more here
If you're looking to add a gradient block overlay instead, read more about it here.
Examples
Image overlay
Basic position control
You can overlay an image using the l-image parameter and control its position using the lx and ly parameters. If the lx or ly value exceeds the dimensions of the input image, the values are adjusted to fit within the image. To change the direction, negative values are also supported by prefixing the value with 'N'.
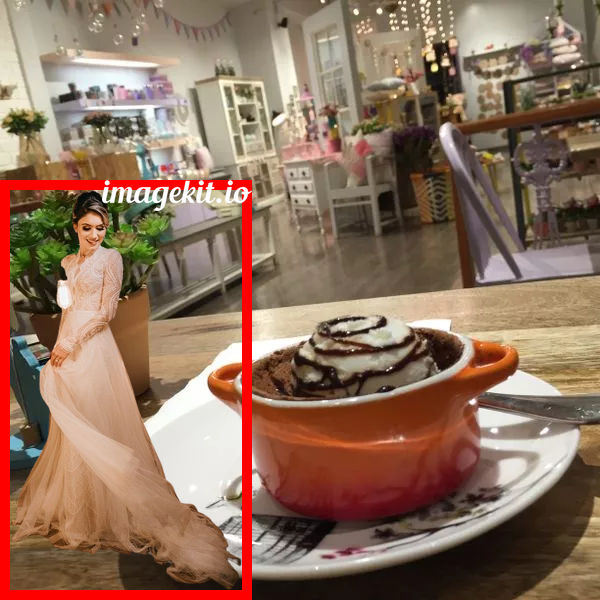
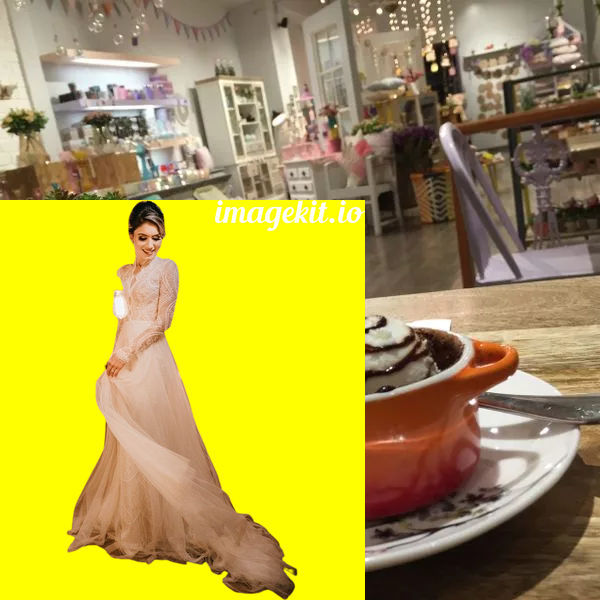
Nesting of image layers
You can overlay multiple images by nesting them using the l-image parameter. In this example, we overlay the resized women-dress.jpeg with a red border on the bottom left corner of the base image and then add the imagekit.io logo on the top right corner of the women-dress.jpeg image. lfo parameter is used to control the position of layer in relative terms.
Transformation on image layer
You can apply various transformations to the image layer using the supported transformation parameters. For example, you can use the cm-pad_resize cropping with a yellow background to fill the image layer's background.
You can also apply additional transformations, such as e-grayscale, to modify the overlay image. Here's an example of turning the overlay image into a grayscale version.
Text overlay
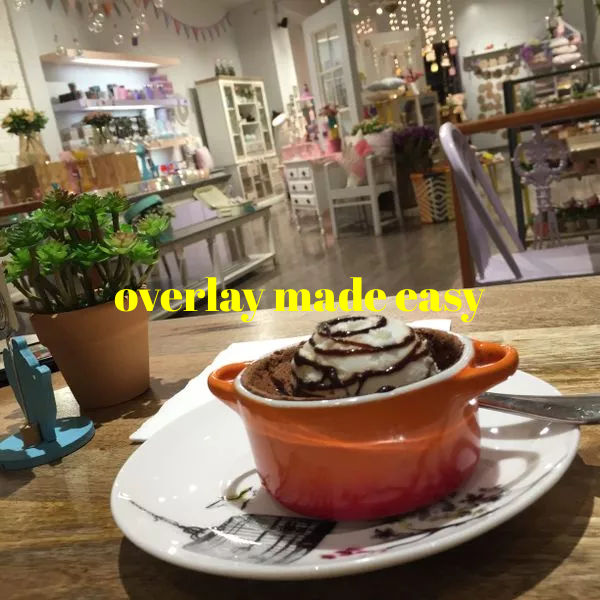
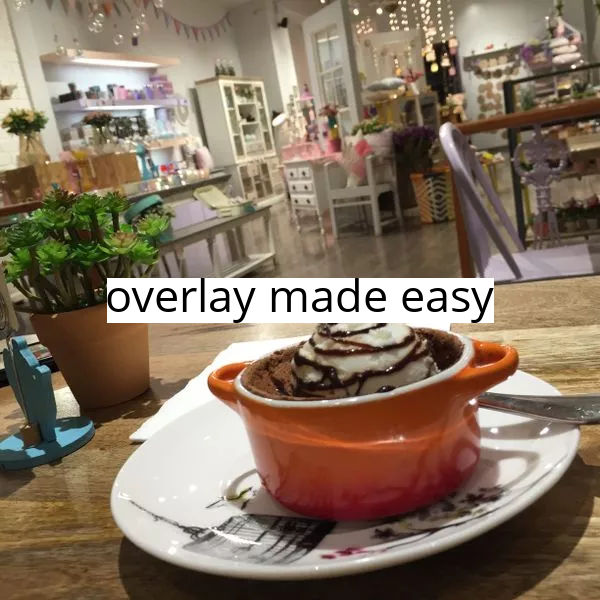
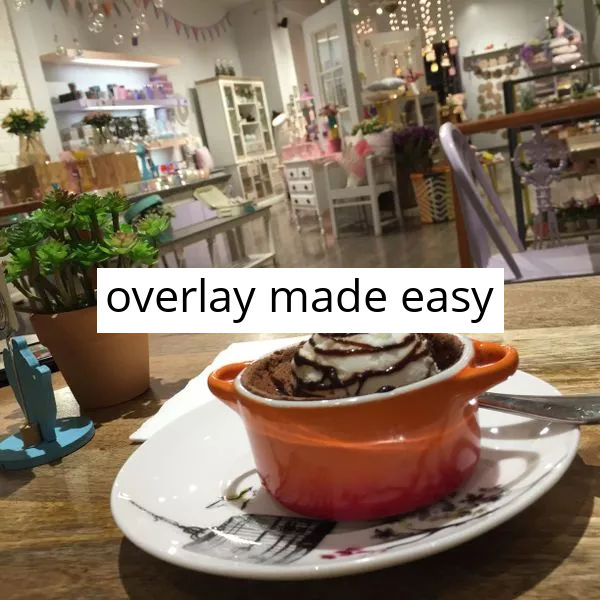
Basic text overlay
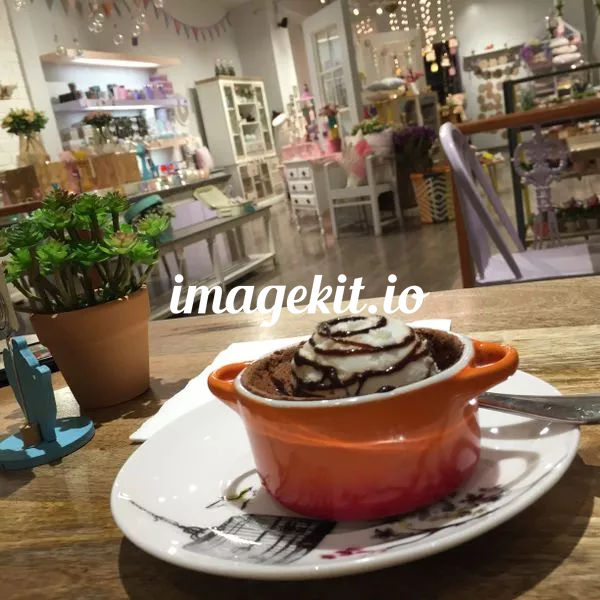
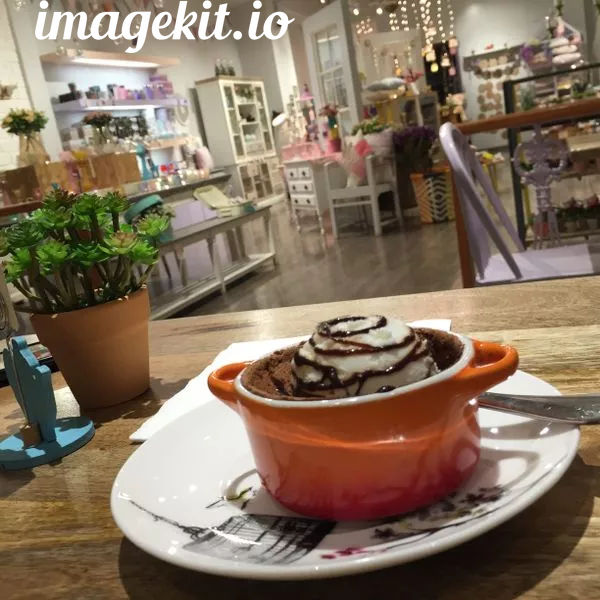
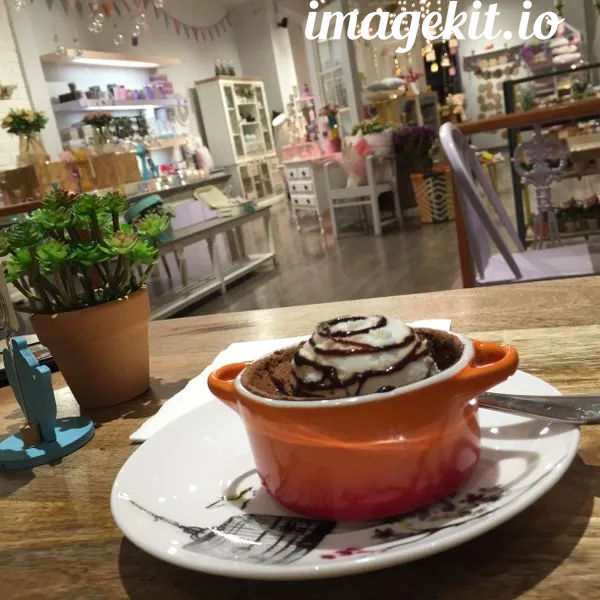
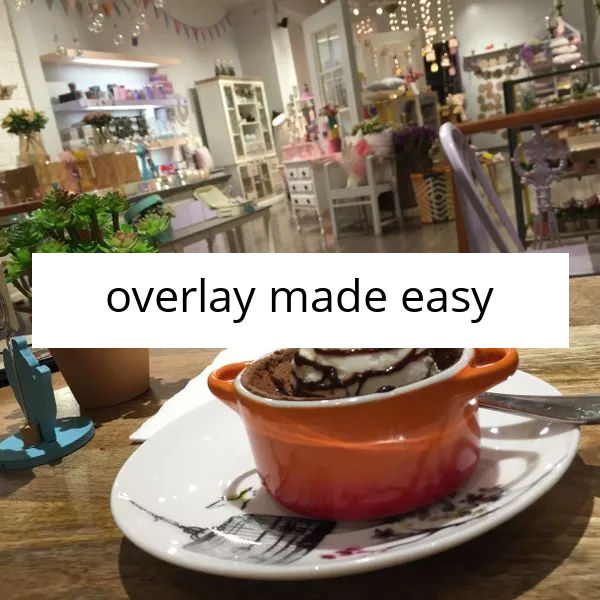
You can add text overlays using the l-text parameter. By default, the text is displayed with the default font and a font size of 45. You can control the font size using the fs parameter.
URL - https://ik.imagekit.io/demo/tr:l-text,i-overlay%20made%20easy,fs-45,l-end/medium_cafe_B1iTdD0C.jpg
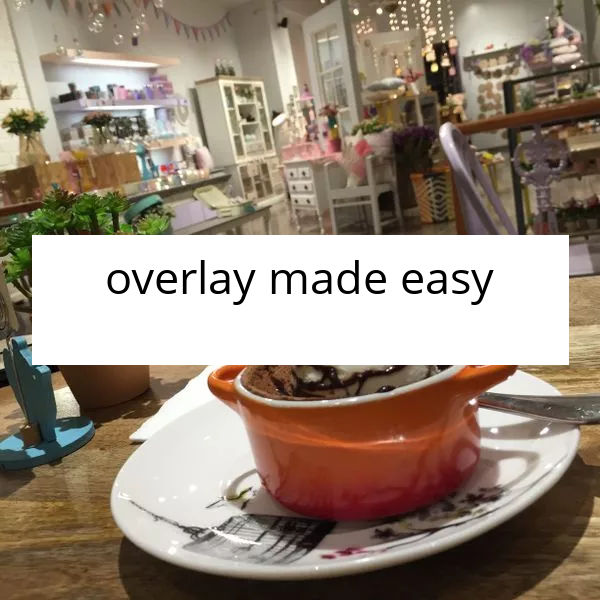
You can change the color of the text using the co parameter.
You can also change the font using the ff parameter. Refer to the list of supported fonts for the available options. Apart from this, you can also use custom fonts.
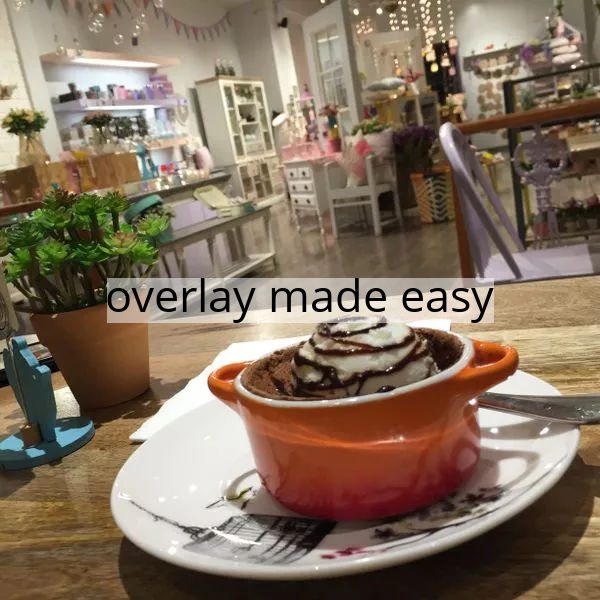
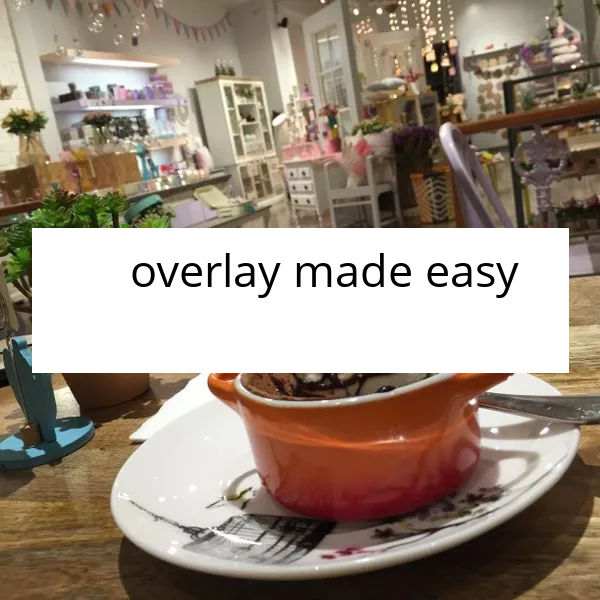
Adding colored background
You can add a colored background to the text overlay using the bg parameter. For example, you can add a white background.
You can also control the transparency of the background by specifying an 8-digit RGBA hex code. The last two characters determine the opacity level (e.g., AAFF0040, 0f0fac75).
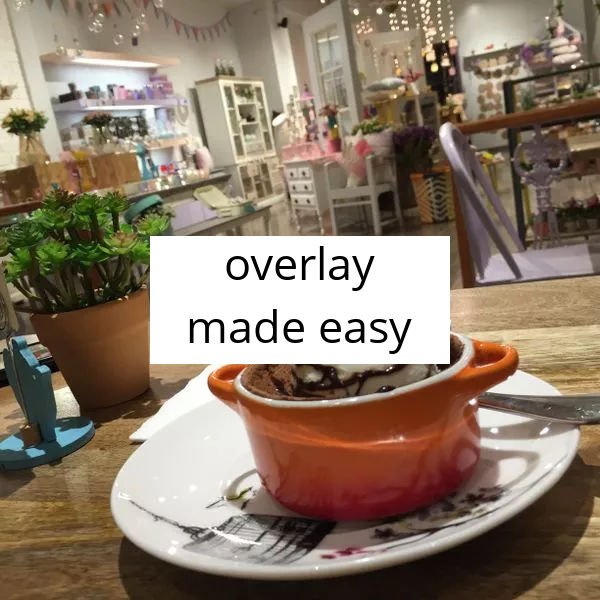
Adding padding
You can add padding to the text overlay using the pa parameter. The padding can be controlled individually for each side using the CSS shorthand notation.
Custom fonts example
If you have custom font files, you can use them in text overlays. In this example, Lacquer-Regular_nGqtVsBJT.ttf is a custom font file uploaded to the root of the media library and accessible at the URL https://ik.imagekit.io/demo/Lacquer-Regular_nGqtVsBJT.ttf.
Non-English character support
You can overlay text in any language with custom fonts, for example.
Last updated


